Image Map

SEI + Some Fun Frames

     
      Hey there friends! Hope that you're finding yourself well today! It's cold, wet and gross out here in California, one of the ten days where it's NOT lovely weather. So, to combat the drab weather, I'm going to share a fun, fresh and frame-worthy layout with you using SEI's Field Notes.


 The frames on the Vignette paper are such a fabulous trend right now. I trimmed the centers from some of them surrounding the photos and create little "framed" points of interest. 

  Little points of interest on a layout can be used to showcase bursts of patterned paper. Try creating a mini banner or layer strips together!

Use SEI's fabulous foam tape to adhere the Vignette patterned paper to a coordinate backing of patterned paper. 

That's it for me! Hope you enjoy the rest of your weekend!

materials:

Paper Crafts Magazine Practical Solutions for Paper Crafter's Blog Hop Winner


 Hey there friends! I have a winner from Paper Crafts Practical Solutions for Paper Crafter's Blog Hop!

The True Random Number Generator picked lucky lady:

pamela said...

Very cute cards! I love how you made the stickers pop!
  Pamela, please email me at queenerh@yahoo.com your contact info and mailing address, so we can get you this amazing issue! Thanks everyone for your lovely comments, they made my day! 

Paper Crafts Magazine Presents: Practical Solutions for Paper Crafter's Blog Hop


     Hey there friends! Paper Crafts Magazine's newest special issue, Practical Solutions for Paper Crafters has hit newsstands and it is HOT! This issue is by far MY favorite because it has great ideas like:


Organization & Storage Solutions
Using Household Items in your Projects
Using Those Scraps of Paper
DIY Embellishments
How to Incorporate Items that You Might Throw Away
Five cards for $5


    Practical Solutions for Paper Crafters has AMAZING ideas that inspired me to organize my craft space with materials and stuff that I had on hand, and the projects are super fabulous! Seriously, almost every page in my issue is earmarked. I even shared it with my students, and they love it!
    I am so happy to share some fun ideas on how you can make 5 cards for $5! This idea is great for the crafter on a budget!


I love the colors and designs in Pink Paislee's Prairie Hill
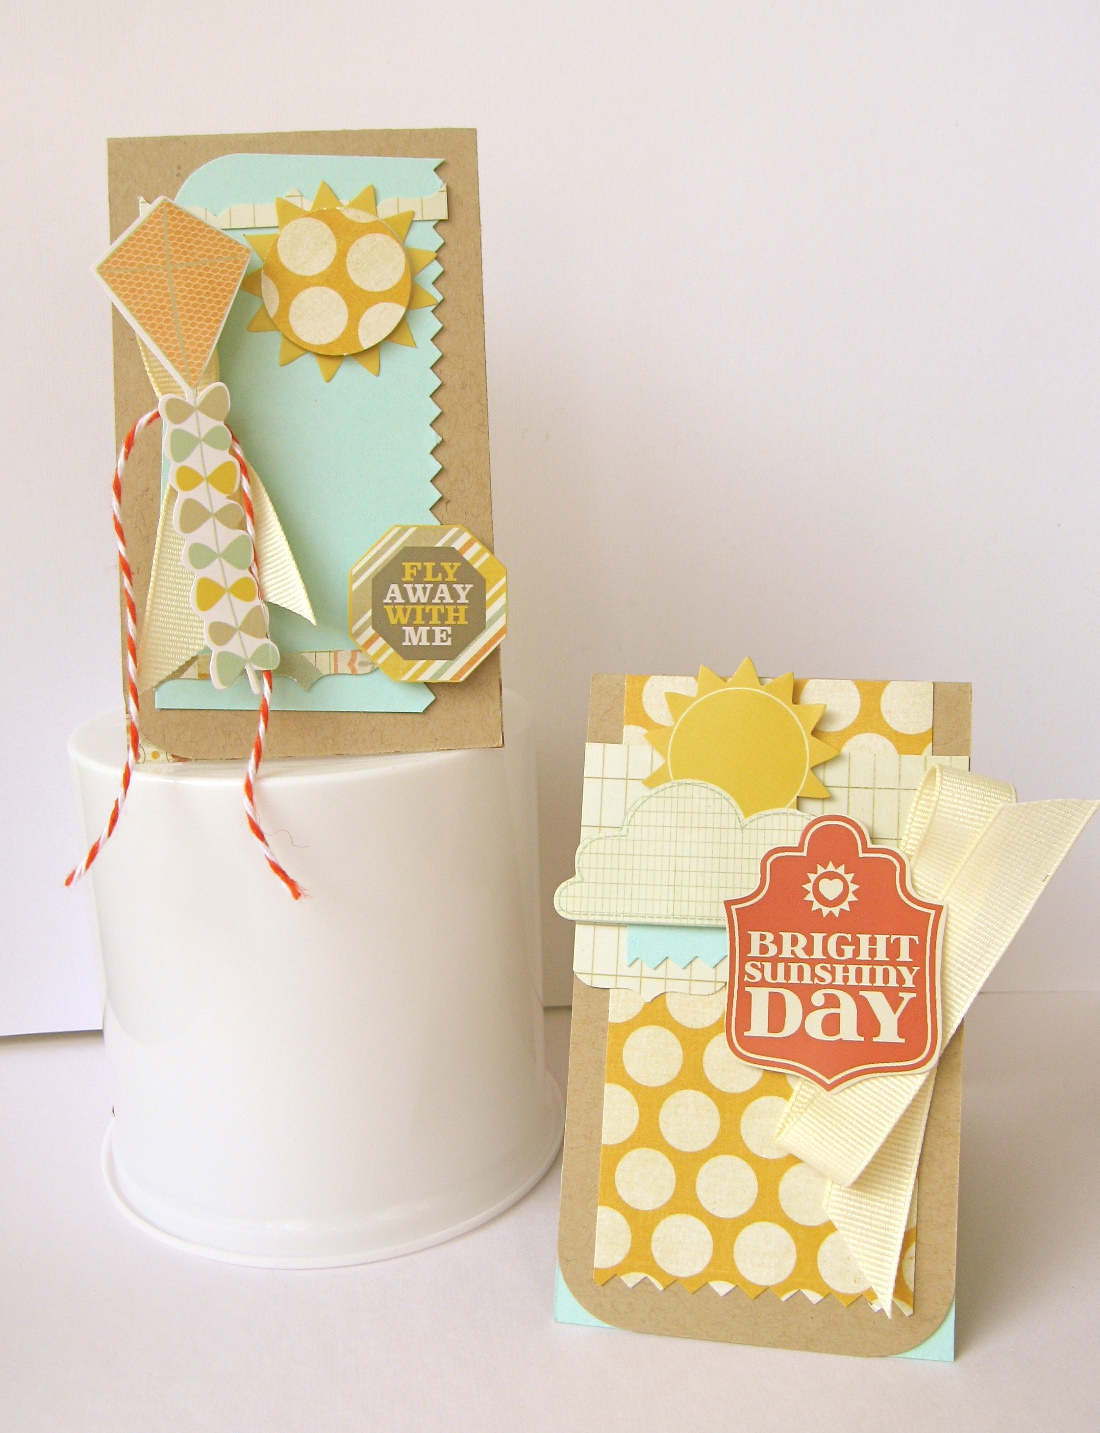
collection. One of my favorite parts of the collection are the Element stickers. Because these stickers are smaller in scale, I created a smaller card base (Julia Aston's template) so they would look perfectly proportioned to the card base. The card bases are 2.5" x 8." You can make four cards just from one piece of cardstock!


Try to find new ways to add ribbon to card. I cut slits in the card and pulled the ribbon. Doing this provides just the right amount of texture without over-powering the design. 

Because the focal point of this card is the cute camera sticker, I trimmed a polaroid shape from patterned paper and created my own photo corners from cardstock. Experiment with trimming and cutting paper based on a central design element or motif; you can get a lot of bang for your buck!

 A pop of saturated color in the twine brings out the orange in the patterned paper. 

Sometimes your eye needs to rest. Colors and busy patterns can muddle the point of interest in a layout or card. Since, were making cards for $5, I trimmed the packaging that came with the Element stickers because the grid pattern of the packaging created   a relief spot between the polka dots pattern and the sun, cloud and sentiment perfectly, allowing the stickers to take center stage.

By now you can probably tell that I depth and using foam tape. Foam tape can transform simple materials into DIY embellishments. The sun in the card was created by adhering a punched patterned paper circle to a sun sticker. To fancy up the kite, I adhered it to some ribbon and added twine, mimicking kite tails.

You can make this set of cards for only $4.80!

Thanks for joining me, make sure to leave a comment at Paper Crafts Connection, a comment below, and a comment on each of the blogs for a chance to win your own copy of this FANTASTIC issue! That's SIX chances to win! Seriously, this is a MUST HAVE for all crafters!

Four more chances to win!

Your next stop is 

materials:

Avocado Arts + Flower Bunches


             Hello friends! Happy to be here sharing some fun Avocado Arts yumminess with you today! But first I'd like to share with you how fun it was to meet one of the owner's of Avocado Arts, Michelle Westhoff Ogdahl this weekend at the Scrapbook Expo in Pleasanton, California. She has been traveling on the road for over a month sharing these incredible stamps with new customers, new stampers and highlighting how fun they are to work with on cards and layouts! She is the SWEETEST woman EVER! Totally real, friendly and fantastic! The Avocado Arts display in the store was perfect, and I am so thrilled we had a chance to meet IRL. 
      Today I combined two sets, Sunshine and Smiles and Springtime Celebrations and used the coordinating Sunshine and Smiles cut file for the flowers! Avocado Arts cut files are SOO easy to use and create great images.

I love the color triad! Plus, the pink ribbon trim adds the perfect pop of color!

I die cut the flowers and then stamped and adhered them with foam tape. For the cracked egg "pots" (for lack of a better name), I stamped the egg and fussy cut it! 

That's it for me today. Make sure to check out the following Pit Crew blogs for more inspiration!


materials:


Avocado Arts + A Little Springtime Stitching

        Hey there friends! I'm here today with the whole Pit Crew to share a sneak peek of next month's set! Sneak peek cards are my FAVORITE because Avocado Arts designs their sets so that you can interchange stamps from different sets to work together! 
   Next month's set is one that you're going to love, and the minute I saw this flower I knew that I wanted to do something fun with stitching the stamp image.


The flower image is dotted to look like a stitched image. I just pierced hole and stitched the petals! I love the texture of stitching on cards! Plus, this sentiment is my favorite! I just can't get enough of it!

Hope you like this card! Make sure to visit my fabulous fellow Pit Crew to see more sneaky peeks of next month's set!

Latisha Yoast


materials

GCD + Me

      
     Hey there friends! I am so excited to share with you that I asked to join GCD Studios as a Card Gal! I am so thrilled to be designing with such AMAZINGLY talented and wonderful ladies, old friends and new!
     Make sure to stop by the blog today, they are having super fantastic giveaways of brand spankin' new product as they announce the new 2012-2013 team! YAY!!
     Look at the fun collections you could win!

Click here to leave a comment for your chance to win.

Click here to leave a comment for your chance to win.

Click here to leave a comment for your chance to win.

Click here to leave a comment for your chance to win.

So, without further ado here is the 2012-2013 team
Layout Gals


SEI + Spring Home Decor

       
     Hey there friends!! It's my second post for today (scroll down for Avocado Arts), and I am so excited to share this fun idea to showcase the perfection that is Vanilla Sunshine.

Turn your favorite papers into seasonal home decor. The patterned paper is backed with cardstock to give it weight and coordinating alligator clips are used to display the home decor. 

To create the burst of sunshine SEI makes perforated sheets that are easy to use. Just tear are the perforations and apply to the card! They're pre-cut perfectly. Alternate adhering patterned paper bands of "sunshine" with SEI's foam tape makes the rays really POP! 

 Create little patchwork kites! Create a kite template from patterned paper, trace onto coordinating paper, trim and paper piece into kites!


In Vanilla Sunshine you'll find the cutest washi tape. I added some washi tape to accent the yummy layers of bordered patterned paper strips on this home decor panel.


Thanks for stopping by!

materials:

Avocado Arts + A Springtime Welcome


         Hey there friends! I am so excited to share with you the newest release from Avocado Arts. Springtime Celebrations is the perfect set for March because it has adorable little egg and flower images, even candy! Plus, the matching cut files are simply perfect!
    Well, it's probably no secret--I like, no LOVE die cuts! I love Avocado Arts cut files because they're the perfect size to coordinate with the stamps and they add fun to any project! So, today's card uses them as the focal point of the card.

Picking patterned papers and colors that complemented this stamp set was so much fun.


I absolutely love that Avocado Arts makes cut files for my Silhouette. To make the flowers I ungrouped the images in the file with my software program, and then copied and pasted multiple flowers and stems, finally cutting on cardstock and patterned paper. Stamp the stems on the die cuts, layer the flowers with foam tape and adhere to card.

Make sure to check out the following Pit Crew blogs for more inspiration!

materials:

SEI + A Shadow Box


     Hey there everyone!! Oooh, I am so excited to share this fun project with you! As you know it's shadow box day at SEI Lifestyle. When I found this easy to assemble kraft shadow box kit in my box, I knew that I totally wanted to play with it! Plus, I am totally, completely LOVING the new Field Notes collection. I saw it at Winter CHA and couldn't wait to get my hands on it! The colors are so saturated, the prints are super trendy, there's yummy specialty paper like denim and velvet, and I love the sequins, pins and pennants that come in the sundries for this collection

SEI makes the most PERFECT chipboard shadow box. It's pre-scored and has adhesive strips so you can construct it super easily!

The shadow box is nice and deep so you can layer whatever you like! I added some wonderfully soft textured green velvet to soften the diagonal lines from the photo and tags.

Add some twine by poking holes through the sides of the box, knotting at the end on the outside.


These manilla tags come with the sundries and you can "jazz"
them up with paper, sequins and trims.

Thanks for checking out this fun and easy project!
 
Pin It button on image hover